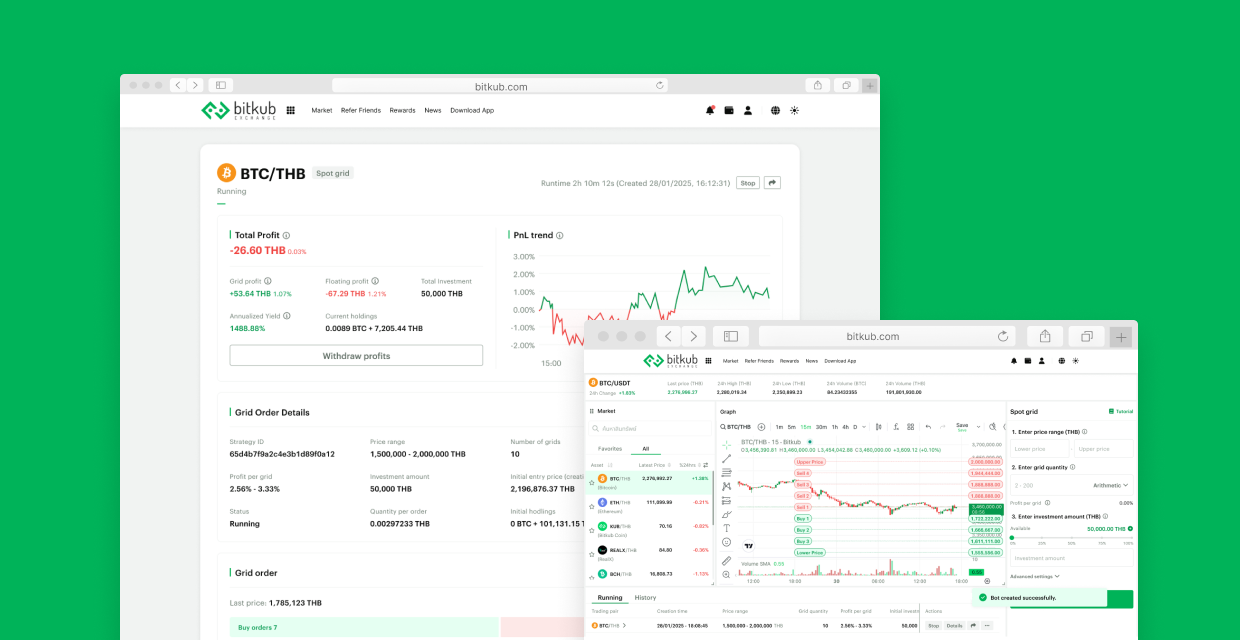
Spot Grid Trade
Spot Grid Trading allows users to automate trading strategies by placing multiple buy and sell orders within a predefined price range. As the market price fluctuates between these levels, the system automatically executes trades to capture profit from volatility.
At Bitkub, I worked on designing the Spot Grid Trading experience, including the strategy configuration flow, validation logic, and monitoring dashboard.
Product Overview
UX/UI design, interaction design, system logic mapping, edge case validation.
Responsibilities
Platform
Web Trading Platform
Discovery
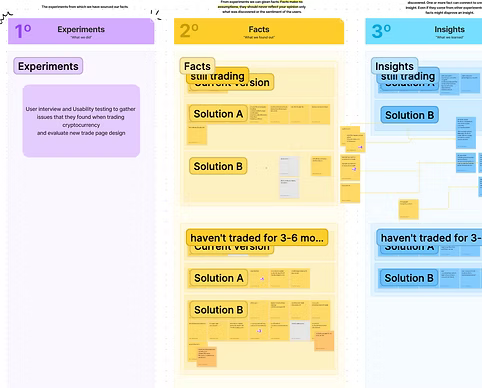
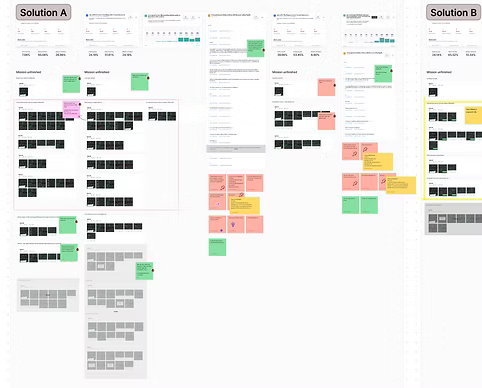
Grid trading is powerful but unforgiving — a wrong combination of parameters doesn't just look wrong, it produces a strategy that fails to execute. So before designing anything, I studied how the major platforms, Binance and OKX, handled it — specifically how they dealt with errors. I went through their configuration flows deliberately entering bad values into every input: lower price above upper price, ranges too narrow, investment amounts too small, and so on, to surface every error state they'd built in.
The reason was that our product manager had only defined a handful of the failure cases in the spec — things like "lower price greater than upper price." By stress-testing the competitors, I could surface every failure a real user might hit, not just the obvious ones, and make sure our flow caught all of them before a strategy could fail on execution.
The Challenge
Configuring a grid trading strategy requires users to define several interdependent parameters — lower price, upper price, grid quantity, and investment amount. Incorrect parameter combinations can produce strategies that fail to execute or behave unpredictably.
The challenge was to design a configuration experience that simplifies these complex parameters while ensuring users cannot create invalid trading strategies.
Prevent Invalid Strategies: Ensure users cannot create grid configurations that the trading engine cannot execute.
Simplify Complex Parameters: Break down the configuration process into clear inputs that reduce cognitive load.
Increase Strategy Transparency: Help users understand how their automated strategy distributes orders across the grid.
Support Both Beginner and Advanced Traders: Allow simple configurations while still supporting advanced parameters such as entry price and trigger price.
Problem Statement
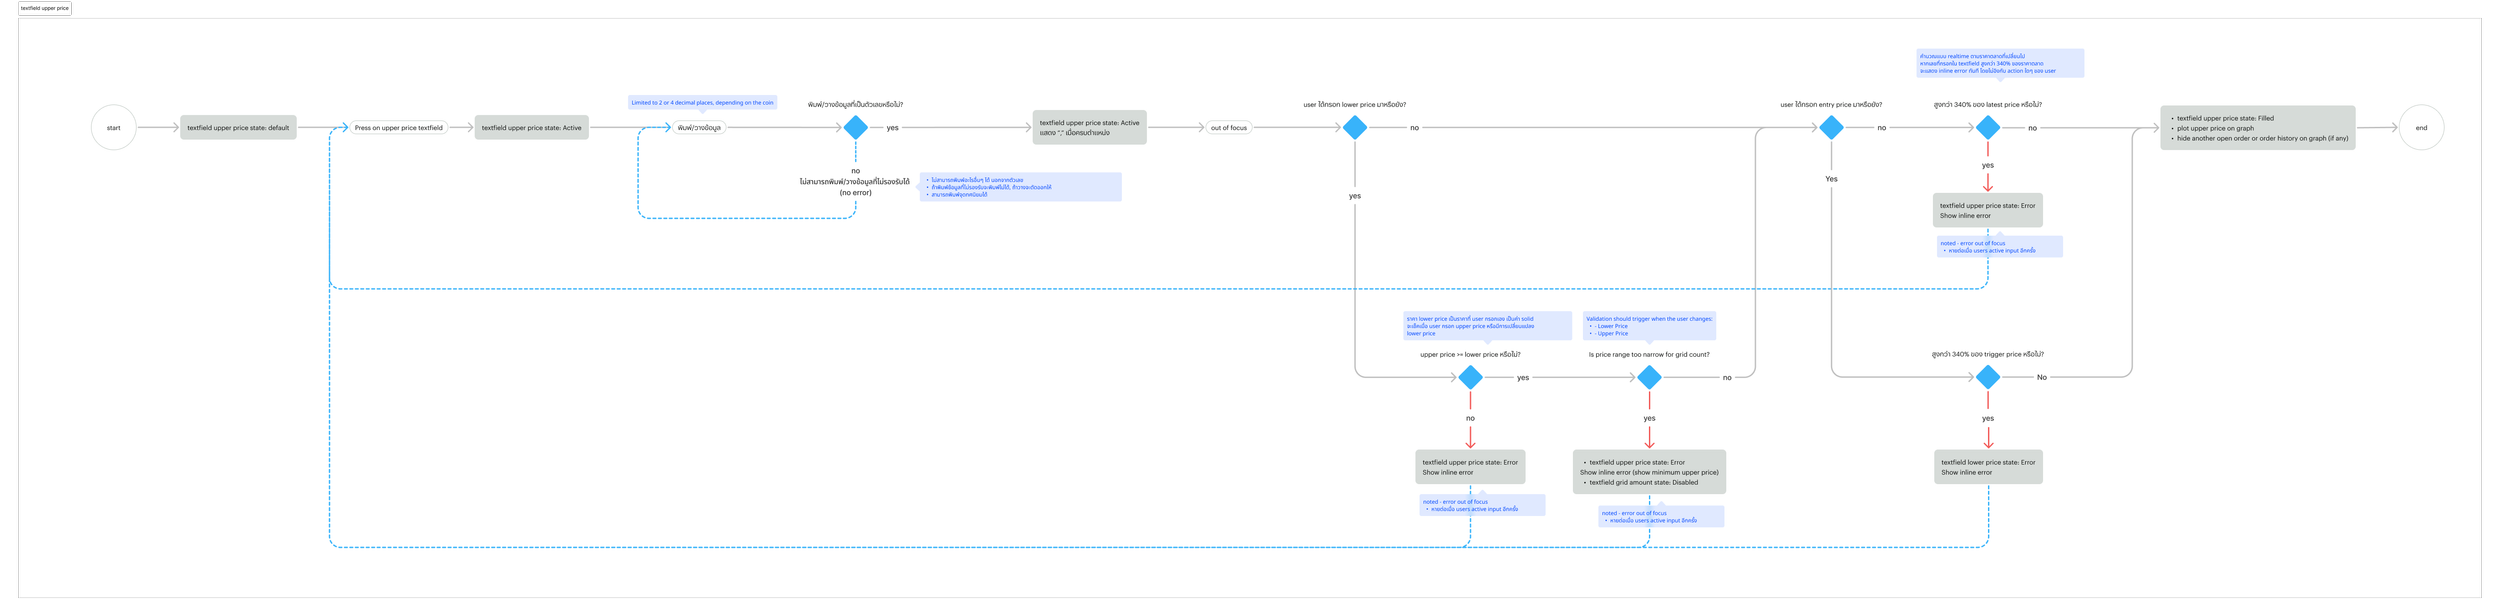
Defining System Logic & Edge Cases
Before designing the UI, I worked closely with the product manager to understand the technical constraints and rules of the grid trading engine.
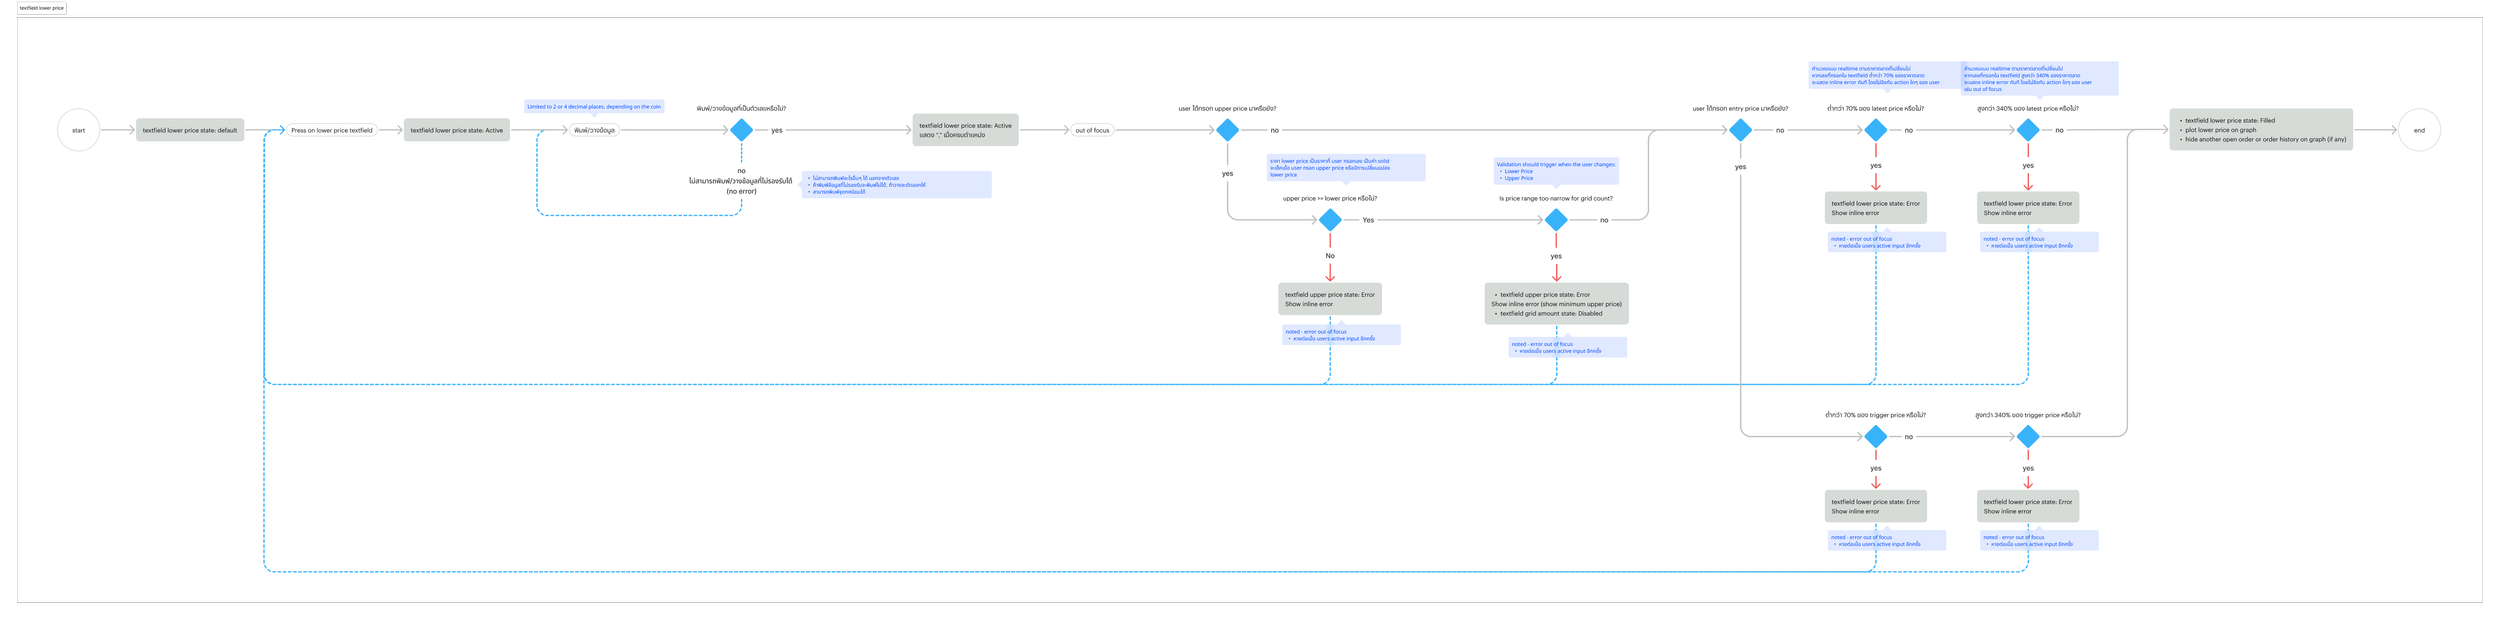
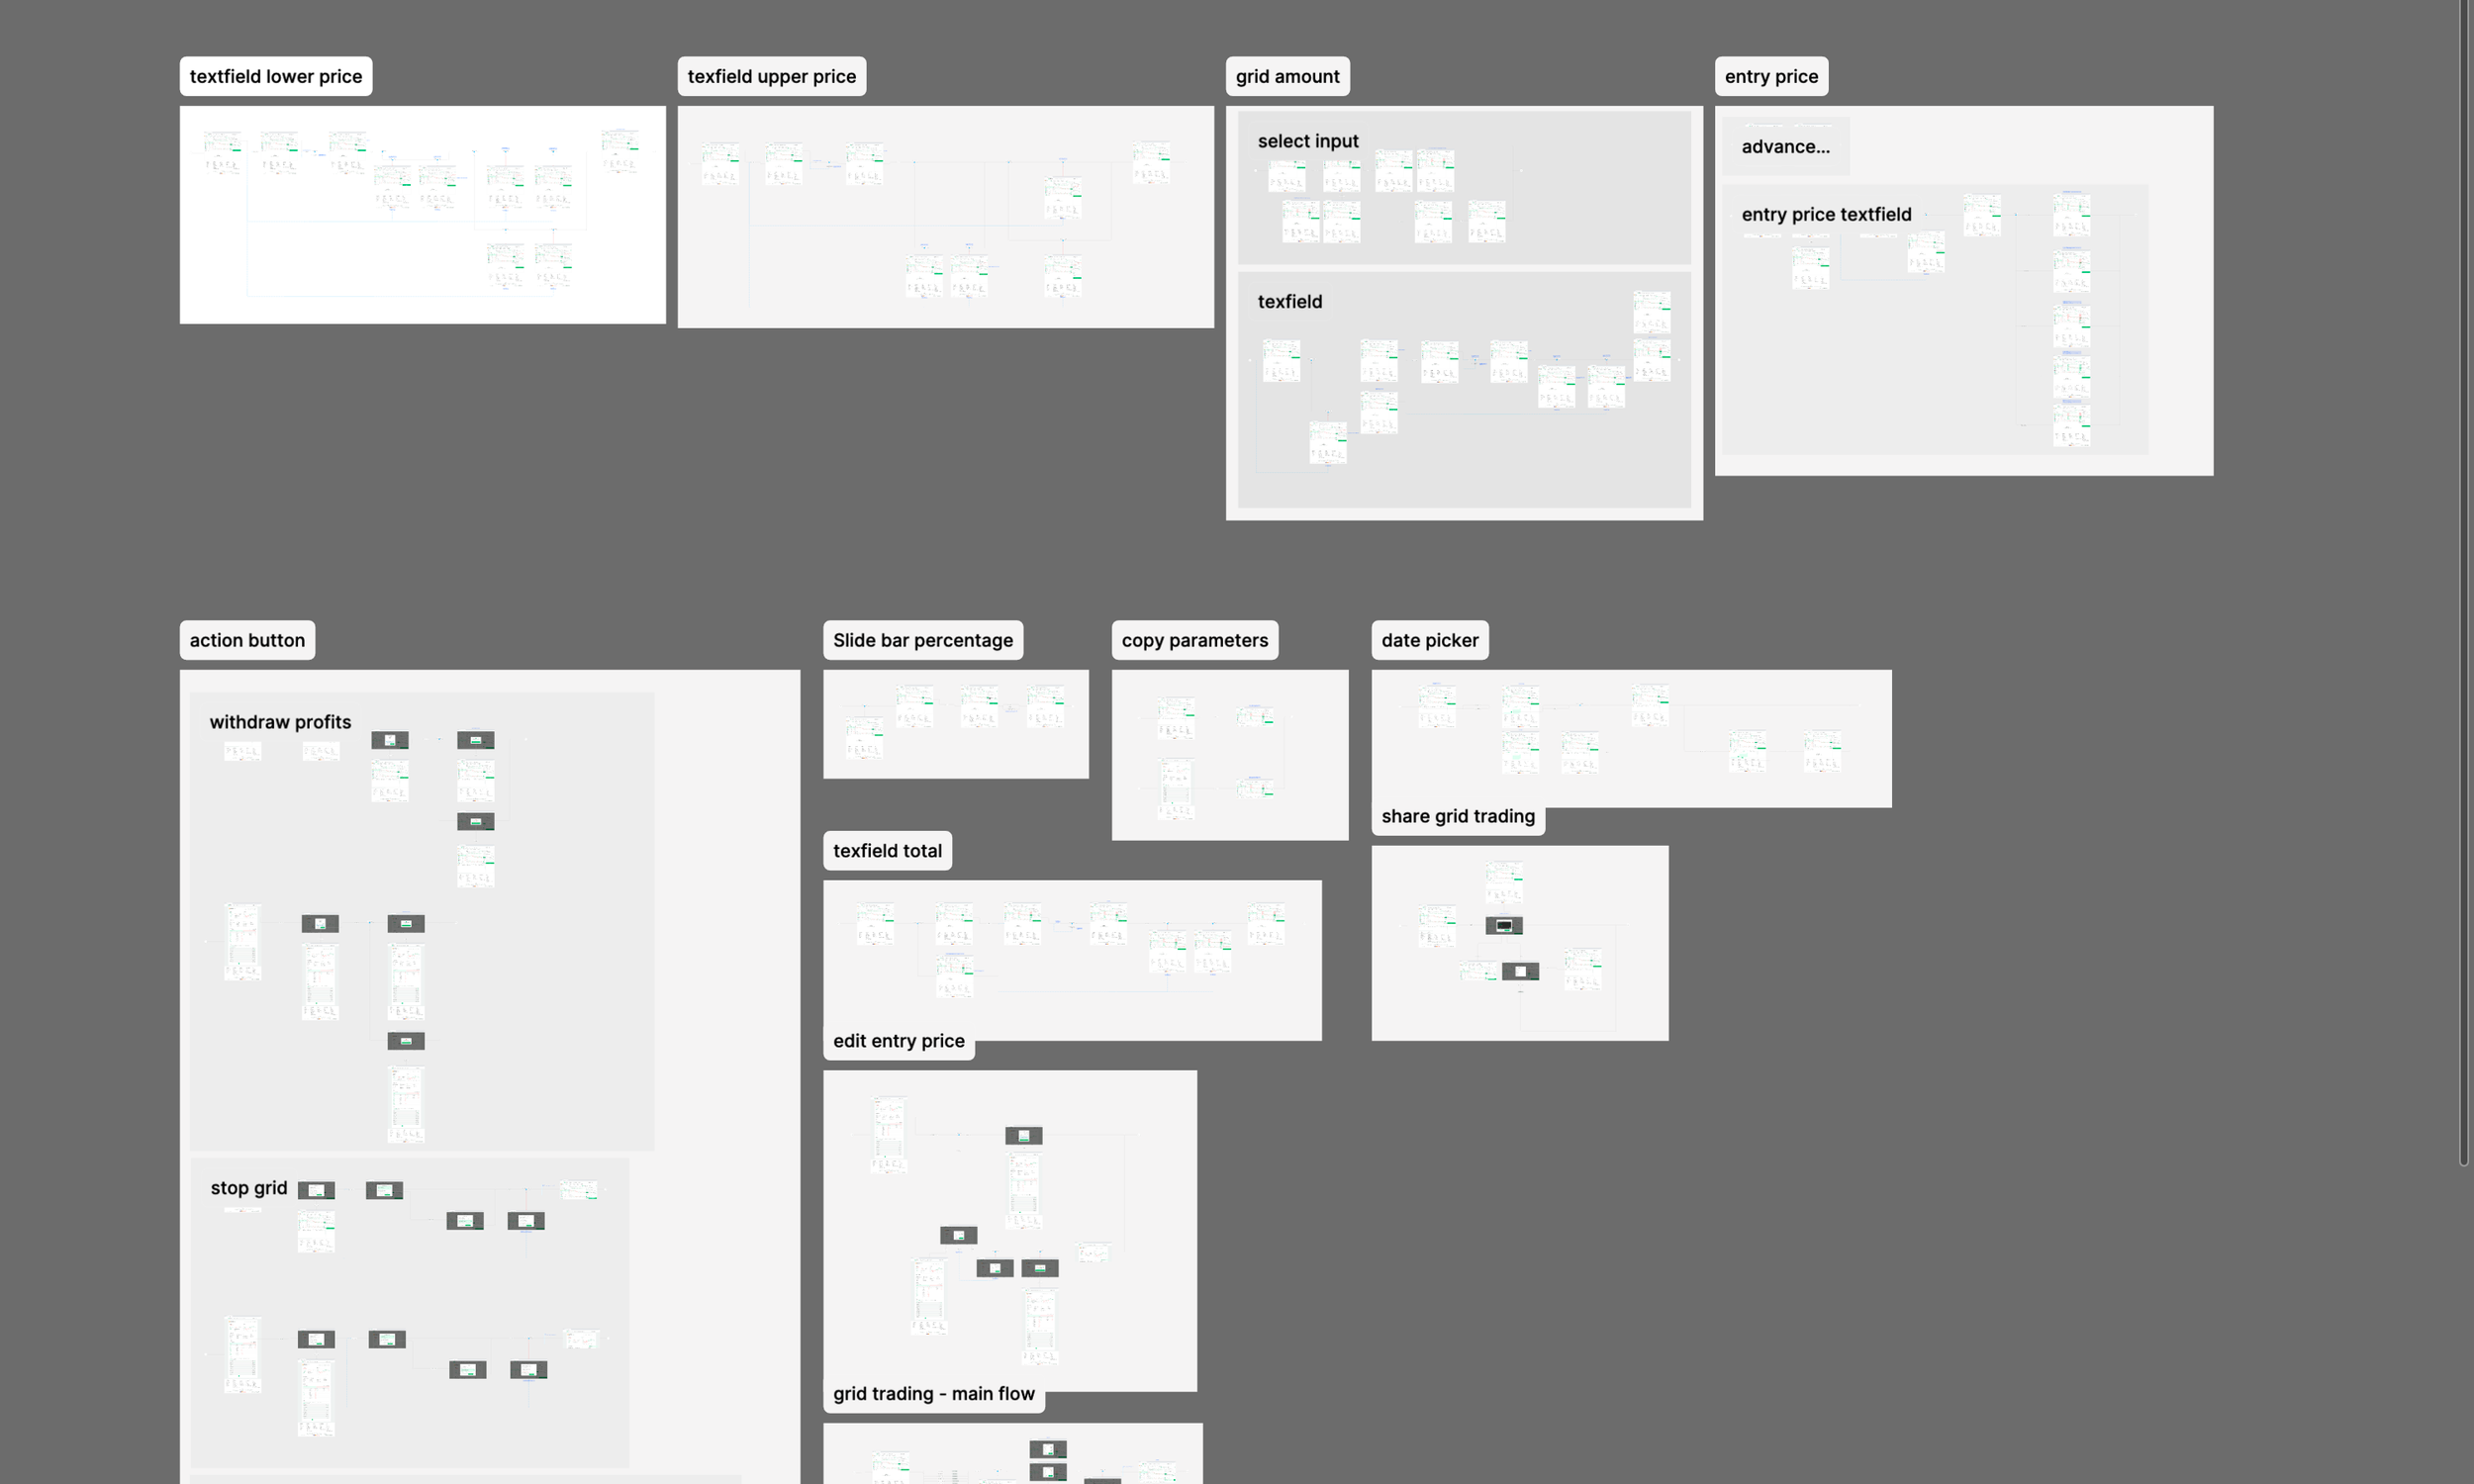
Because grid trading parameters depend heavily on each other, I mapped the full set of edge cases and validation scenarios to ensure the interface accurately reflects system behavior.
Examples of scenarios I needed to handle included:
Lower price greater than upper price
Price range too narrow for the selected grid quantity
Insufficient investment amount for the generated grid orders
Entry price outside the configured price range
Trigger price already passed by the current market price
Mapping these scenarios allowed me to define clear validation rules and error states before designing the final interface.
The Design
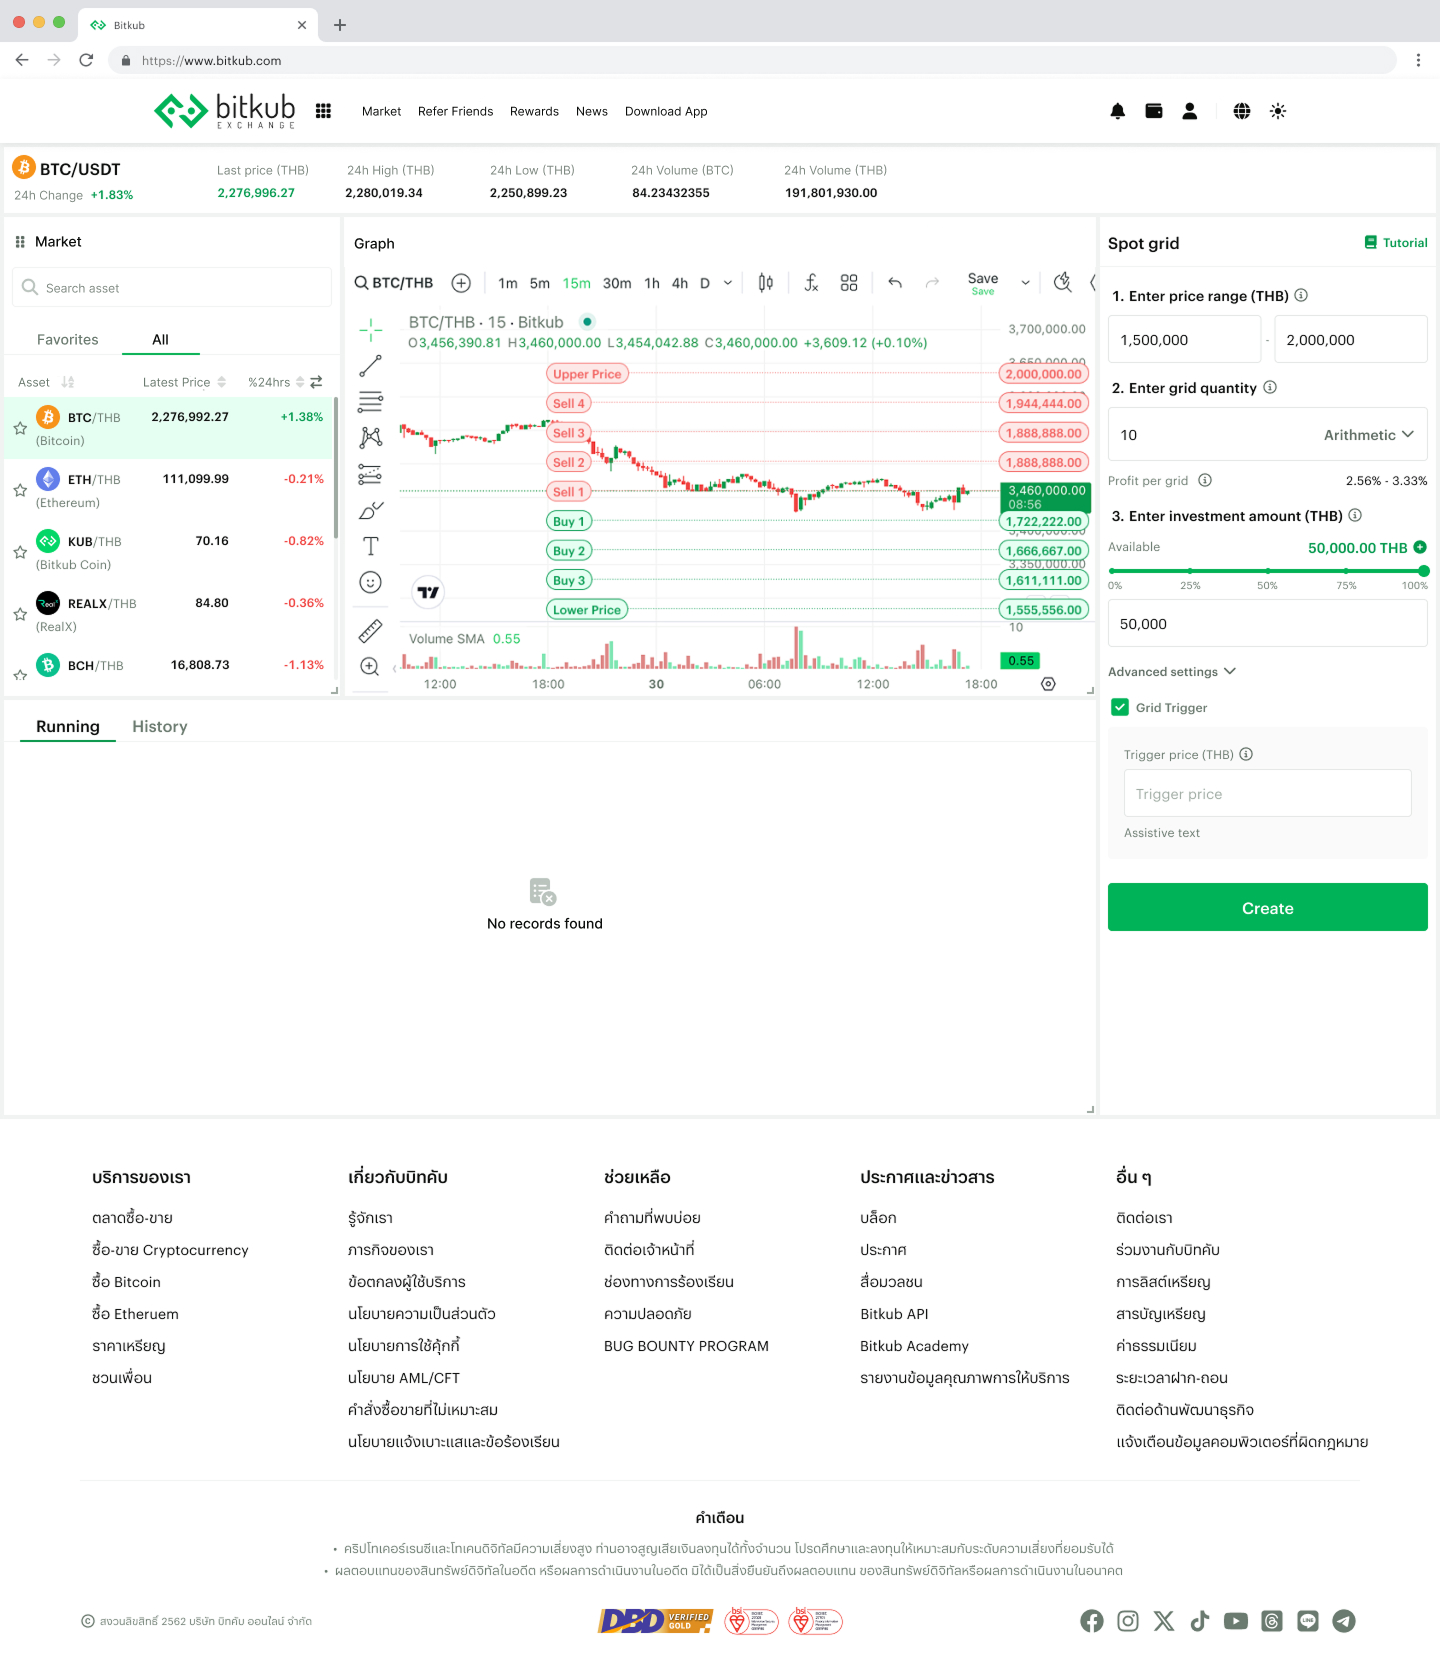
The configuration interface allows users to define their grid trading strategy through structured inputs including:
Price range
Grid quantity
Investment allocation
Optional advanced parameters
Real-time validation ensures users immediately understand when their configuration becomes invalid.
Strategy Configuration
Once activated, users can monitor the performance of their trading bot through a dashboard that shows:
Total profit
Grid profit vs floating profit
PnL trend
Strategy runtime
Current holdings
This allows traders to evaluate how their automated strategy performs over time.
Strategy Monitoring Dashboard
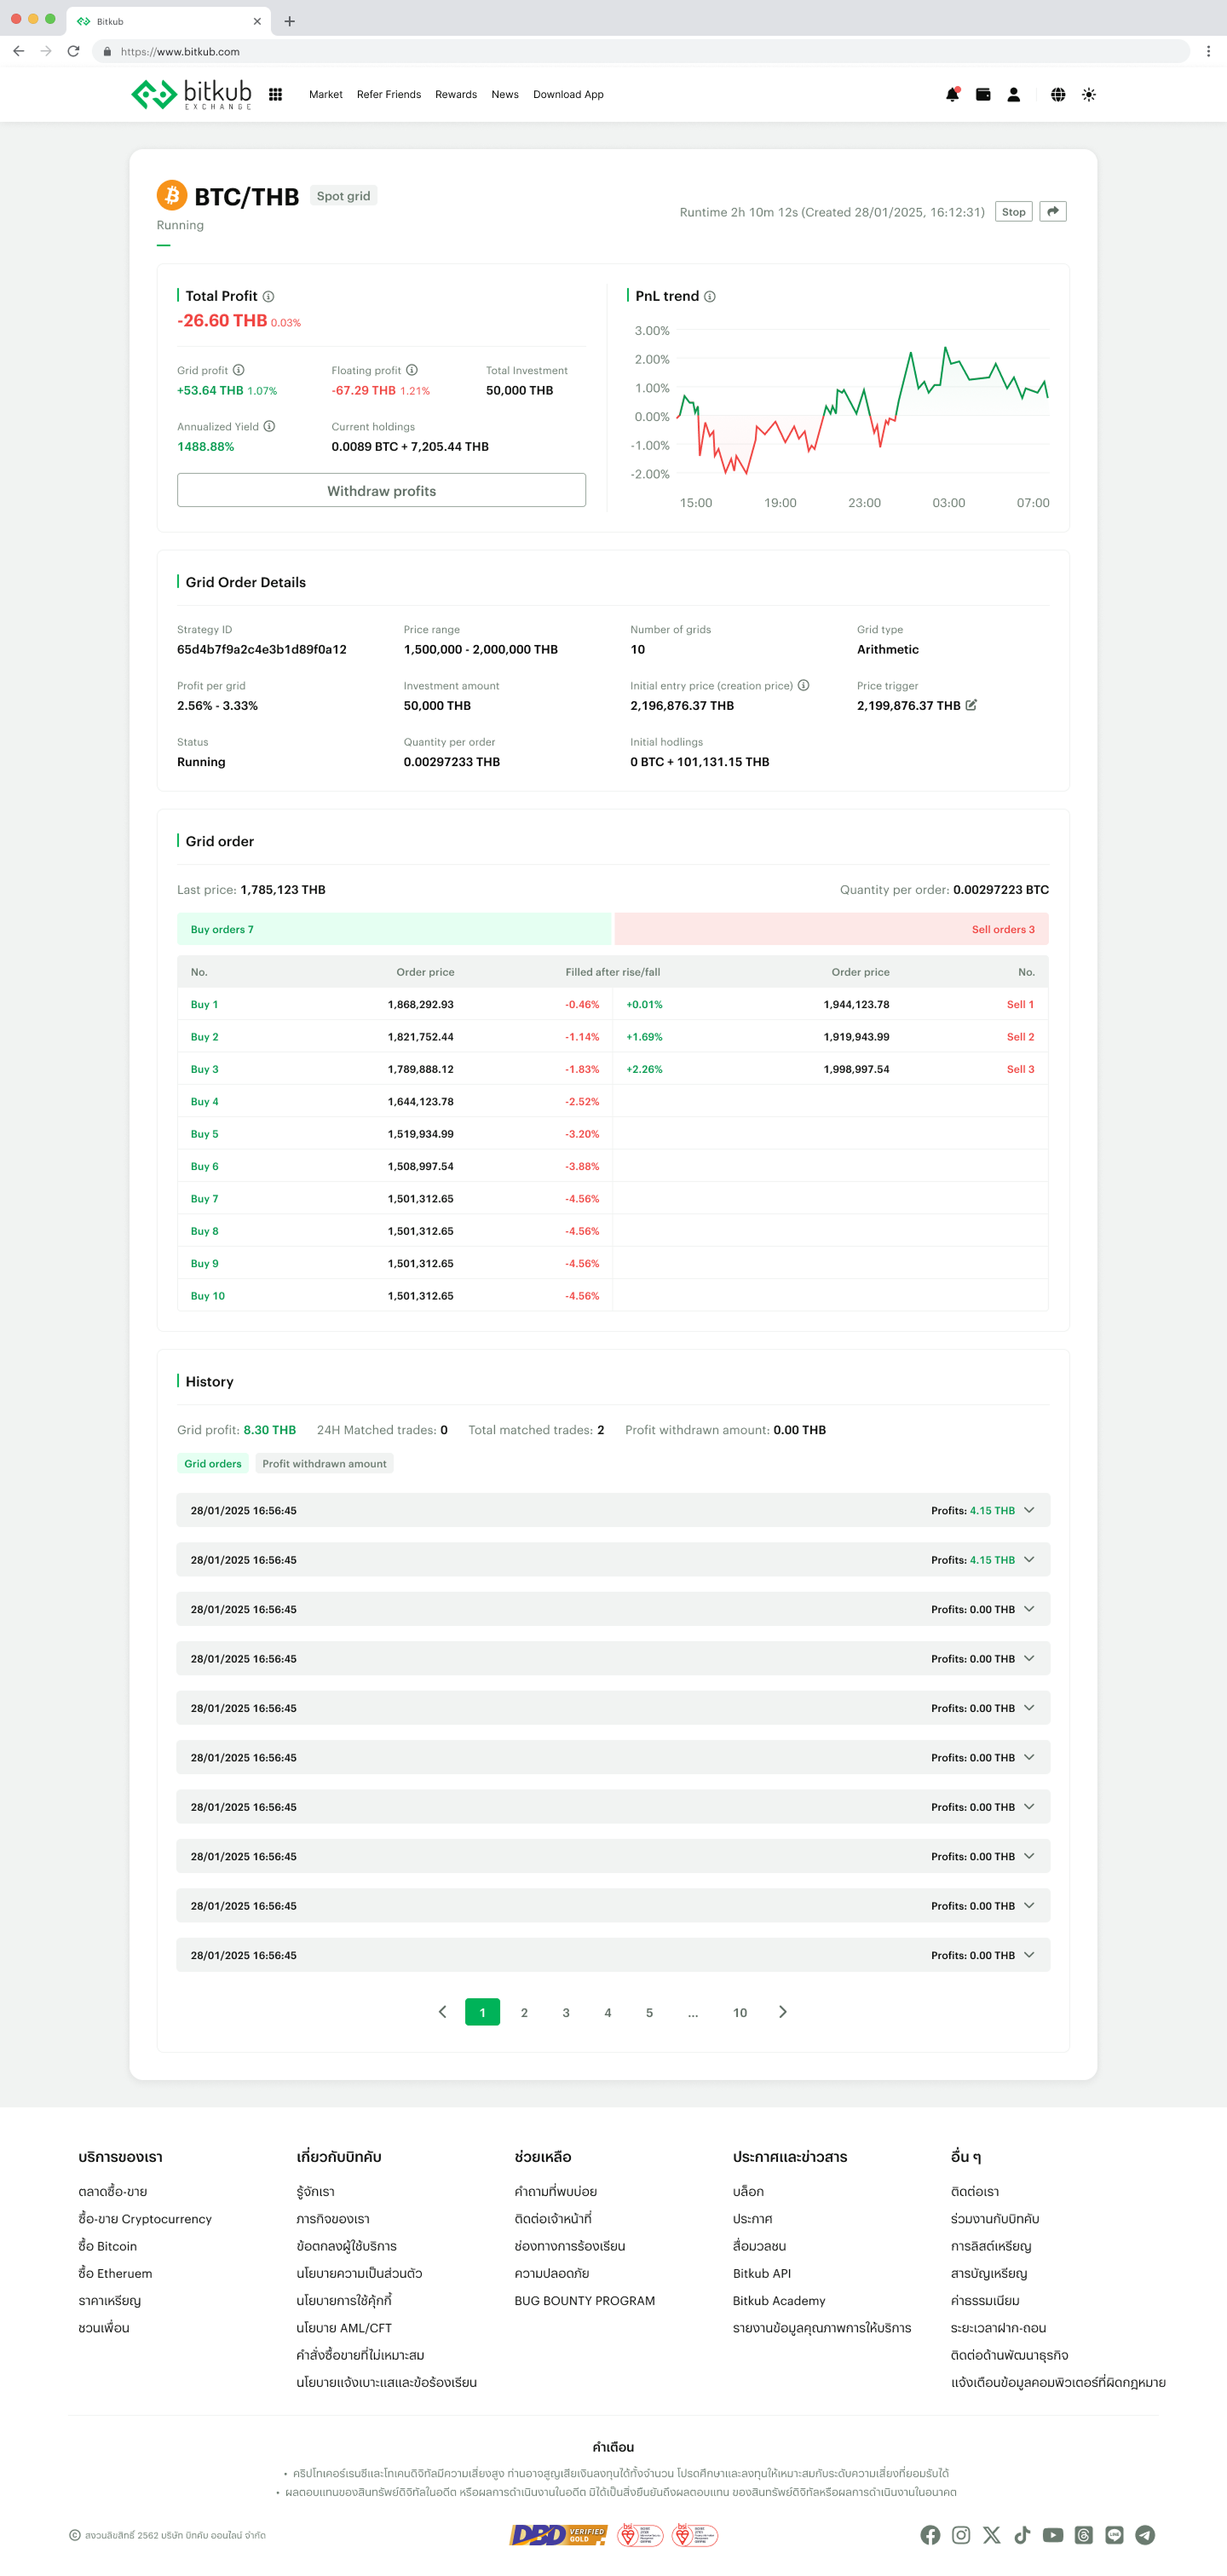
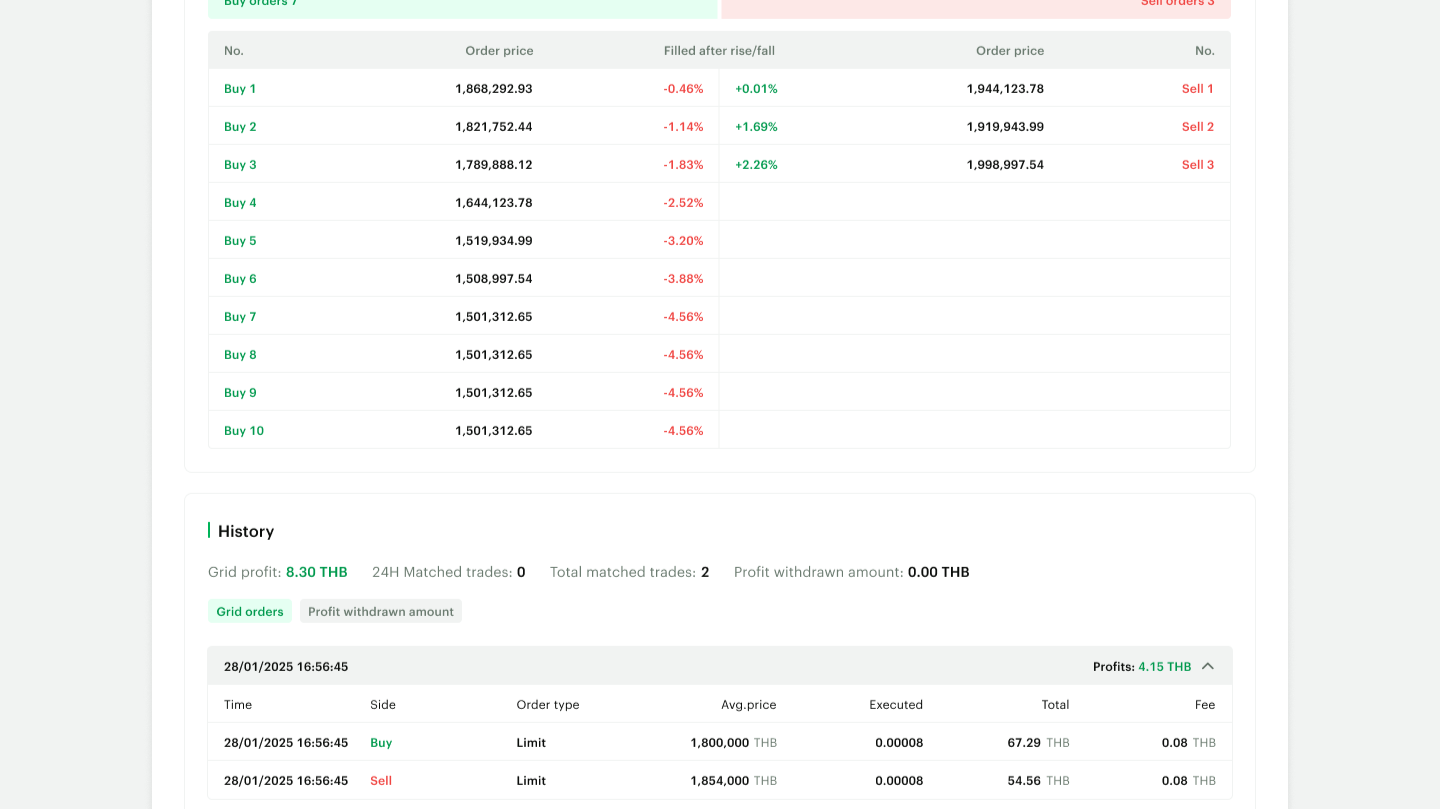
The interface also visualizes how buy and sell orders are distributed across the configured grid.
This helps users clearly see:
Buy orders placed below market price
Sell orders placed above market price
Percentage differences between grid levels
Providing this visualization improves user understanding of how the automated strategy operates.
Order Distribution Visualization
The Outcome
Breaks complex, interdependent parameters into clear, guided inputs — so traders configure a strategy without manually calculating order distribution.
Simplified Automated Trading
Real-time validation checks parameter relationships as the user types, catching invalid strategies before they're placed rather than letting them fail on execution.
Prevents Configuration Errors
Transparent Strategy Behaviour
The monitoring dashboard and order-distribution view show how orders sit across the range and how the strategy is performing — so an active strategy never becomes a black box.
Lets a non-expert configure and run an automated strategy with confidence, without deep technical knowledge of algorithmic systems.
Accessible Algorithmic Trading
How I'd measure success
It's pre-launch, pending regulatory approval, so rather than claim results, I defined how we'd know it worked — each success metric paired with a guardrail so a good number can't hide a bad experience:
Configuration completion vs. strategies stopped within 24h — getting through setup only counts if users don't immediately kill the strategy because they didn't understand it.
Error-state frequency vs. abandonment at errors — fewer errors is good, but only if users who hit one recover and continue rather than drop off.
Trading volume vs. repeat-strategy rate — real adoption looks like users coming back to build a second strategy, not a handful of power users inflating volume.
Alongside the data, I'd run moderated comprehension sessions — have users configure a strategy and explain, in their own words, what it will do and why an error appeared. That catches the thing analytics can't: setup that completes but doesn't actually teach.